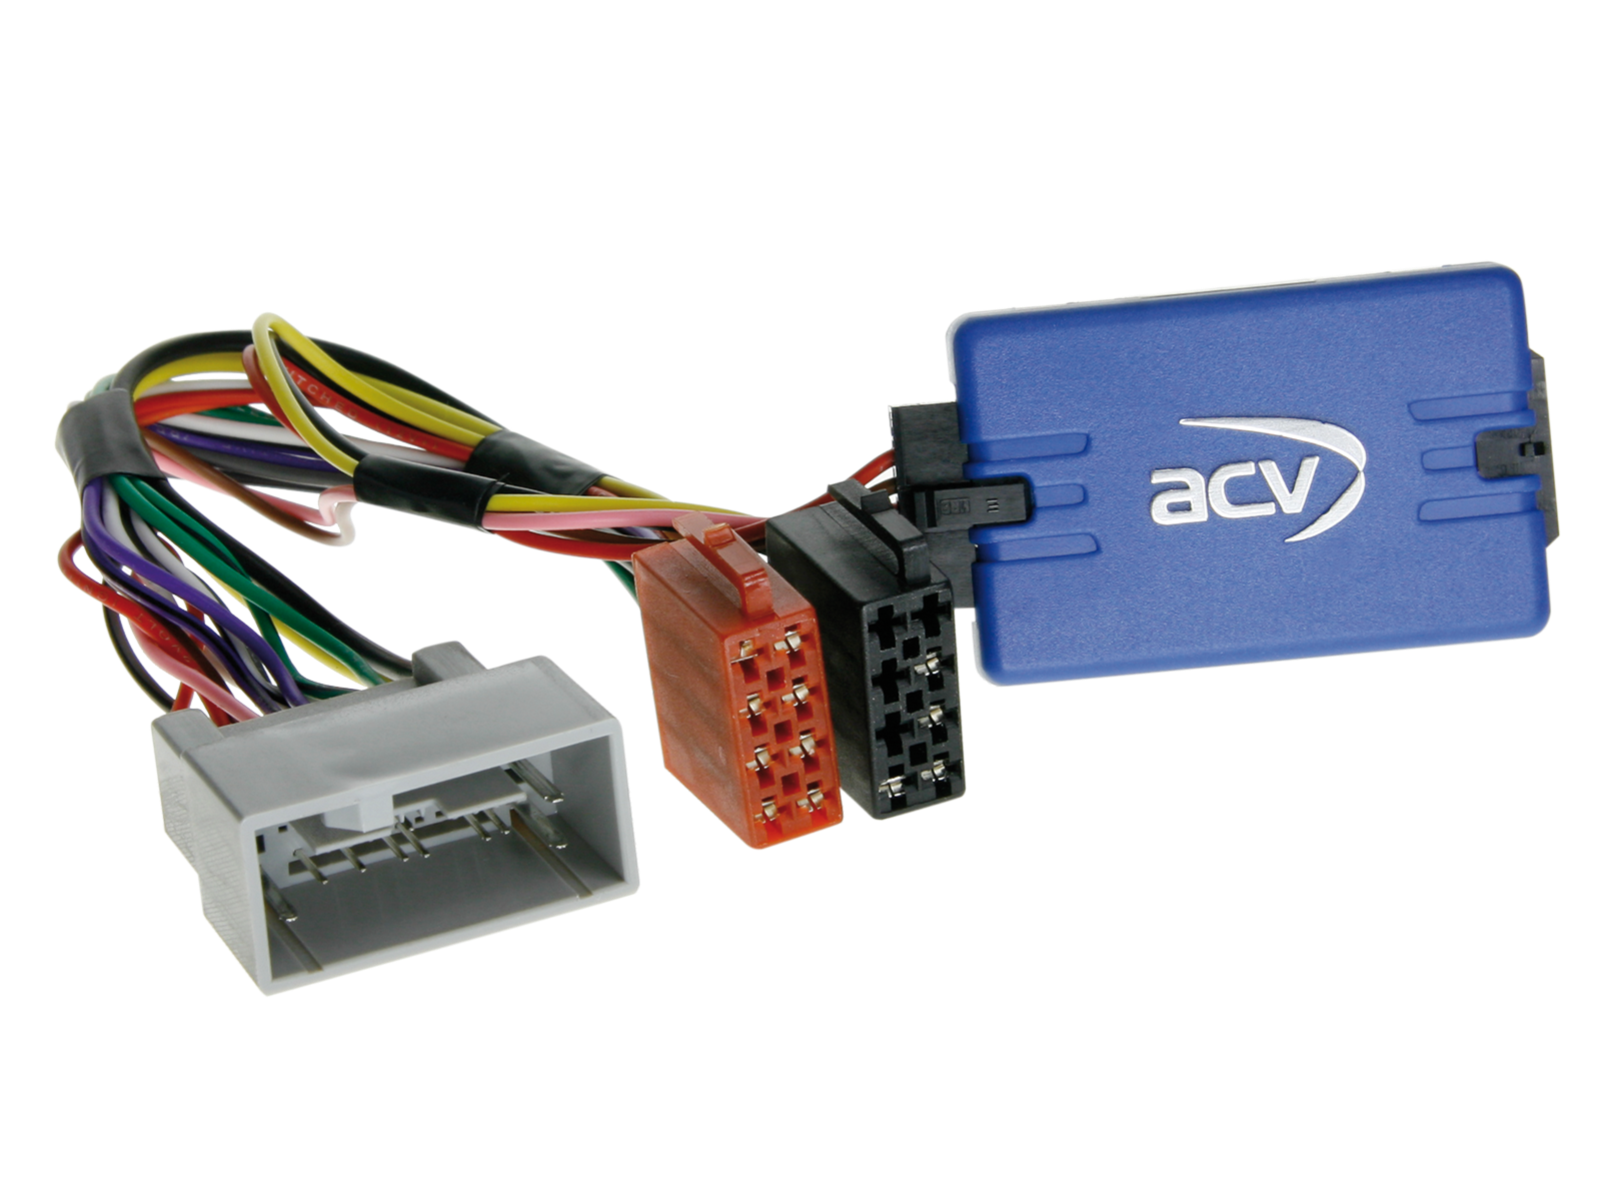
Steering wheel button control adapter for Honda ACV SWC 42SHO003
steering wheel adapter for Honda Accord (CU1/CW1) (06/08->04/11, 04/11->06/15), CR-V (RE5) (01/07->02/10, 04/10->10/12), CR-Z (ZF1) (06/10->12/13), Crosstour (2010->2016), Fit (GE) (2009->2014), Insight (ZE2) (06/09->10/13), Jazz (GE) (11/08->04/11, 05/11->08/15)
More about the product
More about the product
The sale is over
Steering Wheel Control Adapter for Honda
Retain the original radio control functions from the steering wheel when replacing the original radio with a non-original unit. Compare the displayed wiring connectors with the connectors in your vehicle to ensure they match both technically and visually. Before installation, verify that one of the listed original radios was used in the vehicle. Always test vehicle functions, system settings, and steering wheel control (SWC) before final assembly.
Designed for Vehicles
- Honda Accord (CU1/CW1) (06/2008 -> 04/2011) without OEM navigation, without premium OEM audio system, OEM display not supported.
- Honda Accord (CU1/CW1) (04/2011 -> 06/2015) without OEM navigation, without premium OEM audio system, OEM display not supported.
- Honda CR-V (RE5) (01/2007 -> 02/2010) with OEM navigation without volume control.
- Honda CR-V (RE5) (04/2010 -> 10/2012) with OEM navigation without volume control.
- Honda CR-Z (ZF1) (06/2010 -> 12/2013).
- Honda Crosstour (2010 -> 2016).
- Honda Fit (GE) (2009 -> 2014).
- Honda Insight (ZE2) (06/2009 -> 10/2013).
- Honda Jazz (GE) (11/2008 -> 04/2011).
- Honda Jazz (GE) (05/2011 -> 08/2015)
CAN Bus Information
- Connection: 24 Pin Honda connector.
- Vehicles with OEM unit Clarion or Panasonic.
Important Additional Information
- To fully activate the adapter, it is necessary to order a connecting cable for the specific radio brand.
General Installation Guidelines
Pre-Installation Verification
- Check all control functions and vehicle settings with the original OEM radio.
- Remove the OEM unit without power.
- Check all interface connections without power.
Connection and Wiring Sequence
- Perform all settings and configurations without power.
- Check the configuration of the connecting cable.
- Connect the cable according to the instructions for the aftermarket radio.
- Connect other wires according to the device instructions.
- Connect the main power supply last.
- Perform software configuration of the interface according to the instructions in the description and BDA.
- Configure the aftermarket radio for SWC functions, camera, hands-free, antenna power, etc.
- Test the steering wheel control function and vehicle communication.
Interface and HU Cable Configuration Change
- Make changes without power.
- After the change, follow steps 5–8 above.
In Case of Interface or Vehicle System Malfunction
- Return the original OEM unit to the vehicle.
- Turn on the OEM unit.
- Wait for the CAN Bus to go to sleep.
- Check the hardware configuration of the interface.
- After the CAN Bus goes to sleep, follow steps 5–8 above.
When Modifying Connections or Wiring
- Modifications should only be made by professionally trained personnel.
- Before connecting, verify compliance with manufacturer requirements and warranty impact.
- Before connecting, verify functionality by measuring and according to the vehicle diagram.
- Modifications are at your own risk without a guarantee of functionality.
- Modifications are without warranty for potential damage to the vehicle, device, or interface.
- Modifications to pre-installed wiring may void the product warranty.
| Catalog number | 42SHO003 |
| Brand | ACV |
| Links | Official web presentation |
Evaluation
You might also be interested
Propojovací kabel 42C-3414101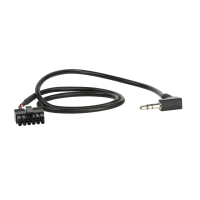 Quick previewconnection cable for steering wheel adapters for Pioneer, Blaupunkt 2010 ->, Kenwood 2017 -> car radios11,19 EUR1 to 4 weeksPropojovací kabel 42C-3414104
 Quick previewconnection cable for steering wheel adapters for Kenwood car radios11,19 EUR1 to 4 weeksPropojovací kabel 42C-3414105
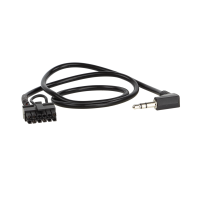 Quick previewconnecting cable for steering wheel adapters for Alpine car radios11,19 EUR1 to 4 weeksPropojovací kabel 42C-3414107
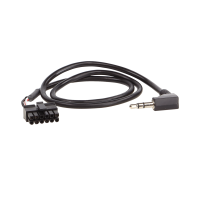 Quick previewconnection cable for steering wheel adapters for Sony, Phonocar car radios11,19 EUR1 to 4 weeksPropojovací kabel 42C-3414124
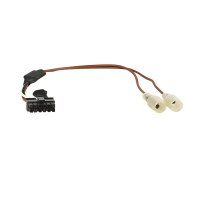 Quick previewconnection cable for steering wheel adapters for car radios Blaupunkt 2010 ->, China HU, ESX, Kenwood 2020 ->, Snooper, XZent28,84 EUR1 to 4 weeksPropojovací kabel 42C-3414128
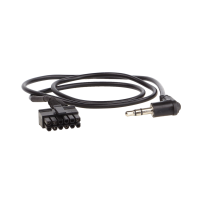 Quick previewconnection cable for steering wheel adapters for JVC car radios11,19 EUR1 to 4 weeksPropojovací kabel 42C-3414140
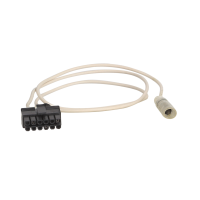 Quick previewconnection cable for steering wheel adapters for JVC car radios11,19 EUR1 to 4 weeksPropojovací kabel 42CTALPINELEAD-0
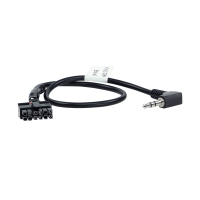 Quick previewconnecting cable for steering wheel adapters for Alpine car radios2,37 EURIn stockPropojovací kabel 42CTBLAUPUNKTLEAD
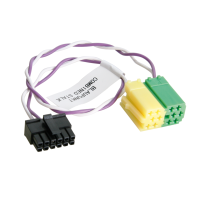 Quick previewconnecting cable for steering wheel adapters for Bosch-Blaupunkt car radios 2010 ->7,18 EUR1 to 4 weeksPropojovací kabel 42CTCHINAHULEAD-0
 Quick previewconnecting cable for steering wheel adapters for car radios Blaupunkt, China HU, ESX, Kenwood 2020 ->, Snooper, XZent5,98 EUR1 to 4 weeksPropojovací kabel 42CTCLARIONLEAD-0
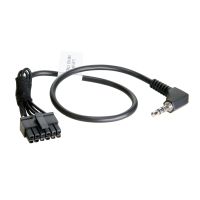 Quick previewconnection cable for steering wheel adapters for Clarion car radios2,37 EUR1 to 4 weeksPropojovací kabel 42CTJVCLEAD-0
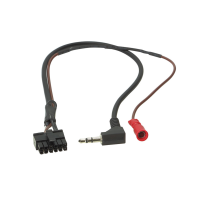 Quick previewconnection cable for steering wheel adapters for JVC car radios2,37 EUR1 to 4 weeksPropojovací kabel 42CTKENWOODLEAD-0
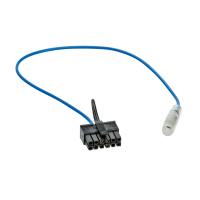 Quick previewconnection cable for steering wheel adapters for Kenwood car radios5,98 EUR1 to 4 weeksPropojovací kabel 42CTMULTILEAD-0
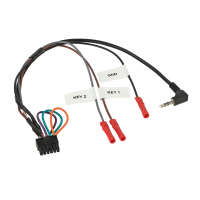 Quick previewconnection cable for steering wheel adapters for Alpine, Blaupunkt 2010 ->, China HU, Clarion, ESX, JVC, Kenwood, Panasonic, Philips, Pioneer, Snooper, Sony, XZent, Zenec car radios2,37 EUR1 to 4 weeksPropojovací kabel 42CTMULTILEAD3-0
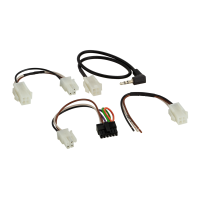 Quick previewconnection cable for steering wheel adapters for car radios Alpine, Beat, Blaupunkt 2010 ->, China HU, Clarion, ESX, JVC, Kenwood, Kenwood 2020 ->, Nakamichi, Panasonic, Philips, Pioneer, Snooper, Sony, XZent, Zenec8,78 EUR1 to 4 weeksPropojovací kabel 42CTMULTILEAD5
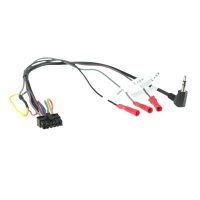 Quick previewconnection cable for steering wheel adapters for Alpine, Beat, Blaupunkt 2010 ->, China HU, Clarion, ESX, JVC, Kenwood, Nakamichi, Panasonic, Philips, Pioneer, Snooper, Sony, XZent, Zenec car radios.2,77 EUR1 to 4 weeksPropojovací kabel 42CTPANASONICLEAD-0
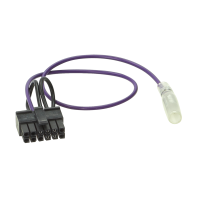 Quick previewconnecting cable for steering wheel adapters for Panasonic car radios1,56 EUR1 to 4 weeksPropojovací kabel 42CTPIONEERLEAD-0
 Quick previewconnection cable for steering wheel adapters for Pioneer, Blaupunkt 2010 ->, Kenwood 2017 -> car radios1,97 EUR1 to 4 weeksPropojovací kabel 42CTPIONEERLEAD2
 Quick previewconnecting cable for steering wheel adapters for Pioneer car radios1,97 EUR1 to 4 weeksPropojovací kabel 42CTSONYLEAD-0
 Quick previewconnection cable for steering wheel adapters for car radios Sony, Blaupunkt 2010 ->, Kenwood 2017 ->1,97 EUR1 to 4 weeksPropojovací kabel 42CTZENECLEAD-0
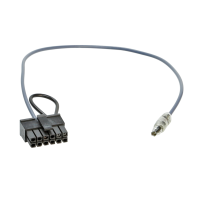 Quick previewconnecting cable for steering wheel adapters for Zenec, XZent car radios1,56 EUR1 to 4 weeksPropojovací kabel 42XMULTILEAD1-0
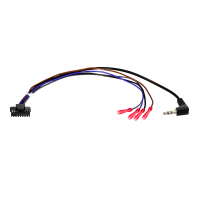 Quick previewconnection cable for steering wheel adapters for Alpine, Blaupunkt 2010 ->, China HU, Clarion, ESX, Grundig, JVC, Kenwood, Philips, Pioneer, Snooper, Sony, XZent, Zenec car radios5,17 EUR1 to 4 weeks
Quick previewconnection cable for steering wheel adapters for Pioneer, Blaupunkt 2010 ->, Kenwood 2017 -> car radios11,19 EUR1 to 4 weeksPropojovací kabel 42C-3414104Quick previewconnection cable for steering wheel adapters for Kenwood car radios11,19 EUR1 to 4 weeksPropojovací kabel 42C-3414105Quick previewconnecting cable for steering wheel adapters for Alpine car radios11,19 EUR1 to 4 weeksPropojovací kabel 42C-3414107Quick previewconnection cable for steering wheel adapters for Sony, Phonocar car radios11,19 EUR1 to 4 weeksPropojovací kabel 42C-3414124Quick previewconnection cable for steering wheel adapters for car radios Blaupunkt 2010 ->, China HU, ESX, Kenwood 2020 ->, Snooper, XZent28,84 EUR1 to 4 weeksPropojovací kabel 42C-3414128Quick previewconnection cable for steering wheel adapters for JVC car radios11,19 EUR1 to 4 weeksPropojovací kabel 42C-3414140Quick previewconnection cable for steering wheel adapters for JVC car radios11,19 EUR1 to 4 weeksPropojovací kabel 42CTALPINELEAD-0Quick previewconnecting cable for steering wheel adapters for Alpine car radios2,37 EURIn stockPropojovací kabel 42CTBLAUPUNKTLEADQuick previewconnecting cable for steering wheel adapters for Bosch-Blaupunkt car radios 2010 ->7,18 EUR1 to 4 weeksPropojovací kabel 42CTCHINAHULEAD-0Quick previewconnecting cable for steering wheel adapters for car radios Blaupunkt, China HU, ESX, Kenwood 2020 ->, Snooper, XZent5,98 EUR1 to 4 weeksPropojovací kabel 42CTCLARIONLEAD-0Quick previewconnection cable for steering wheel adapters for Clarion car radios2,37 EUR1 to 4 weeksPropojovací kabel 42CTJVCLEAD-0Quick previewconnection cable for steering wheel adapters for JVC car radios2,37 EUR1 to 4 weeksPropojovací kabel 42CTKENWOODLEAD-0Quick previewconnection cable for steering wheel adapters for Kenwood car radios5,98 EUR1 to 4 weeksPropojovací kabel 42CTMULTILEAD-0Quick previewconnection cable for steering wheel adapters for Alpine, Blaupunkt 2010 ->, China HU, Clarion, ESX, JVC, Kenwood, Panasonic, Philips, Pioneer, Snooper, Sony, XZent, Zenec car radios2,37 EUR1 to 4 weeksPropojovací kabel 42CTMULTILEAD3-0Quick previewconnection cable for steering wheel adapters for car radios Alpine, Beat, Blaupunkt 2010 ->, China HU, Clarion, ESX, JVC, Kenwood, Kenwood 2020 ->, Nakamichi, Panasonic, Philips, Pioneer, Snooper, Sony, XZent, Zenec8,78 EUR1 to 4 weeksPropojovací kabel 42CTMULTILEAD5Quick previewconnection cable for steering wheel adapters for Alpine, Beat, Blaupunkt 2010 ->, China HU, Clarion, ESX, JVC, Kenwood, Nakamichi, Panasonic, Philips, Pioneer, Snooper, Sony, XZent, Zenec car radios.2,77 EUR1 to 4 weeksPropojovací kabel 42CTPANASONICLEAD-0Quick previewconnecting cable for steering wheel adapters for Panasonic car radios1,56 EUR1 to 4 weeksPropojovací kabel 42CTPIONEERLEAD-0Quick previewconnection cable for steering wheel adapters for Pioneer, Blaupunkt 2010 ->, Kenwood 2017 -> car radios1,97 EUR1 to 4 weeksPropojovací kabel 42CTPIONEERLEAD2Quick previewconnecting cable for steering wheel adapters for Pioneer car radios1,97 EUR1 to 4 weeksPropojovací kabel 42CTSONYLEAD-0Quick previewconnection cable for steering wheel adapters for car radios Sony, Blaupunkt 2010 ->, Kenwood 2017 ->1,97 EUR1 to 4 weeksPropojovací kabel 42CTZENECLEAD-0Quick previewconnecting cable for steering wheel adapters for Zenec, XZent car radios1,56 EUR1 to 4 weeksPropojovací kabel 42XMULTILEAD1-0Quick previewconnection cable for steering wheel adapters for Alpine, Blaupunkt 2010 ->, China HU, Clarion, ESX, Grundig, JVC, Kenwood, Philips, Pioneer, Snooper, Sony, XZent, Zenec car radios5,17 EUR1 to 4 weeksask us