Steering wheel button control adapter for Citroen / Fiat / Opel ACV SWC 42A-1094-026-0
steering wheel adapter for Citroen Jumper (250) (07/2024 -> 2025), e-Jumper (259) (07/2024 -> 2025), Relay (250) (2024 -> 2025) / Fiat Ducato (ZAF 250) (11/2021 -> 11/2023), Ducato (ZAF 250) (11/2023 -> 2025), e-Ducato (ZAF 250) (04/2021 -> 03/2024), e-Ducato (ZAF 250) (03/2024 -> 2025) / Opel Movano Cargo C (Y) (01/2024 -> 2025), Movano Electric Cargo C (Y) (01/2024 -> 2025)
More about the product
More about the product
We will help you with your purchase
- You can return the goods to us within 14 days
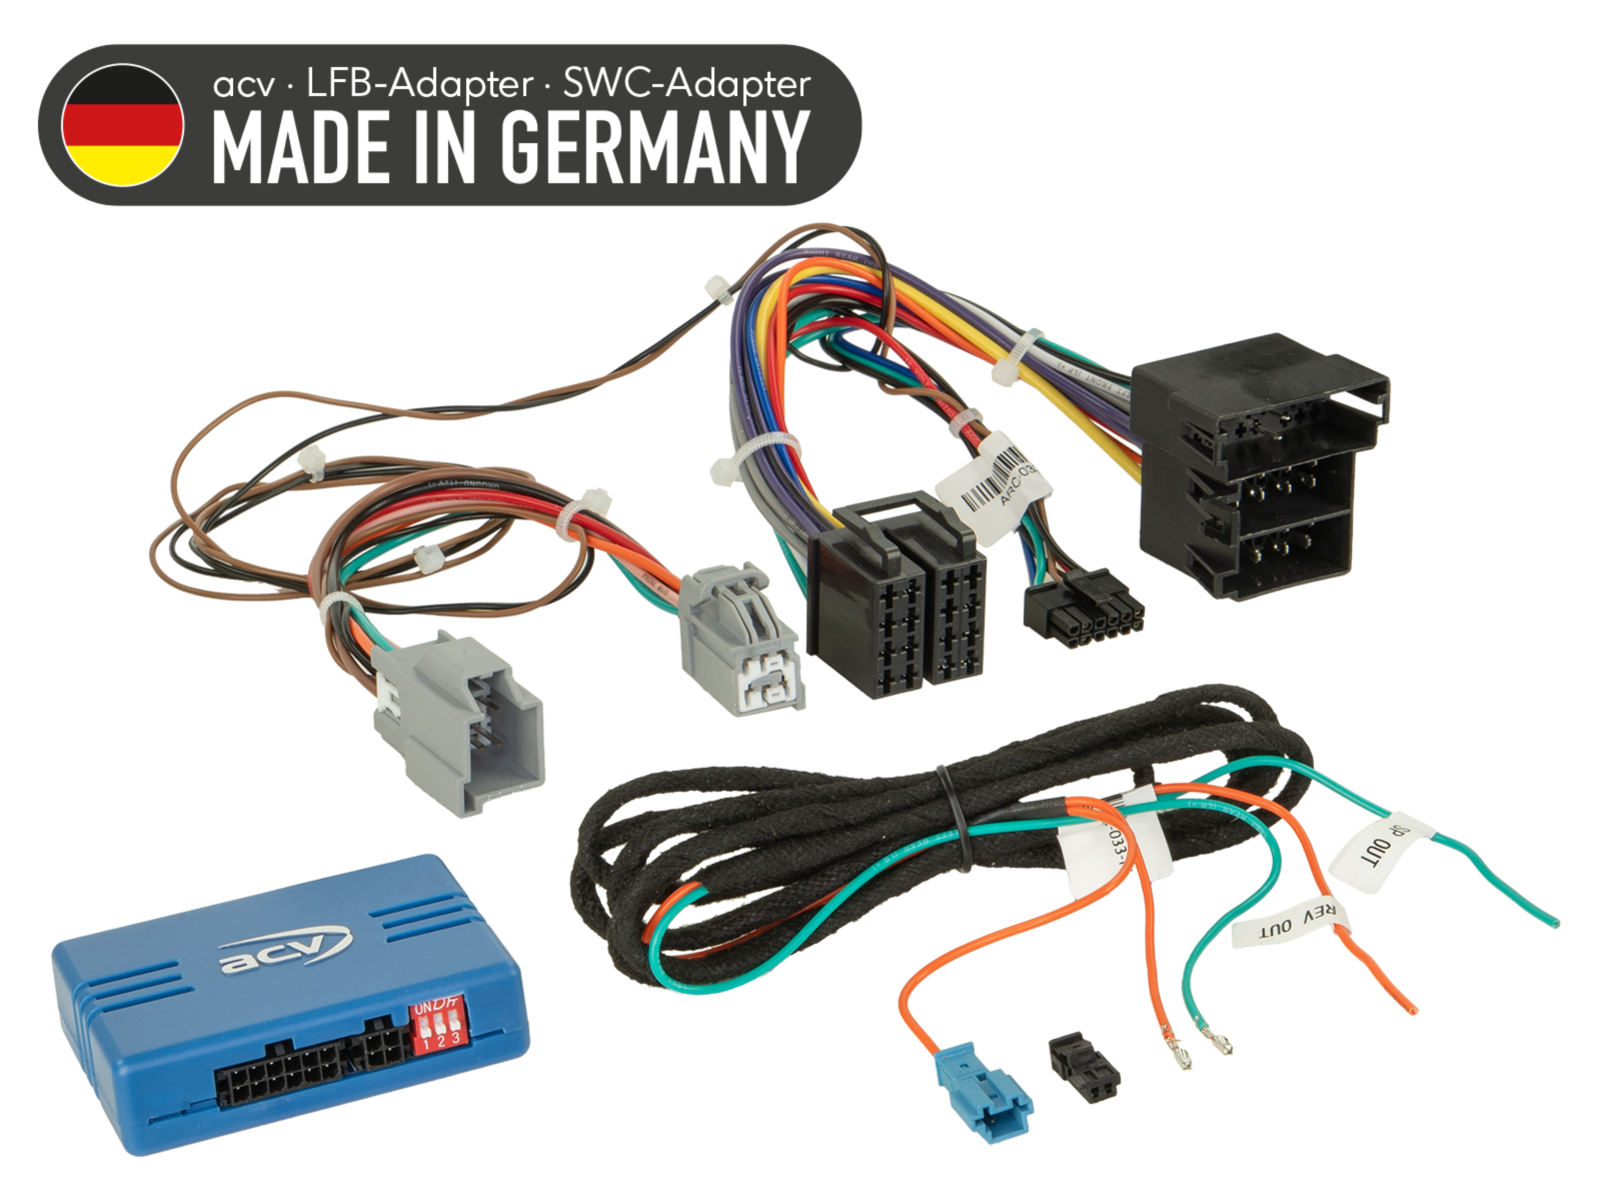
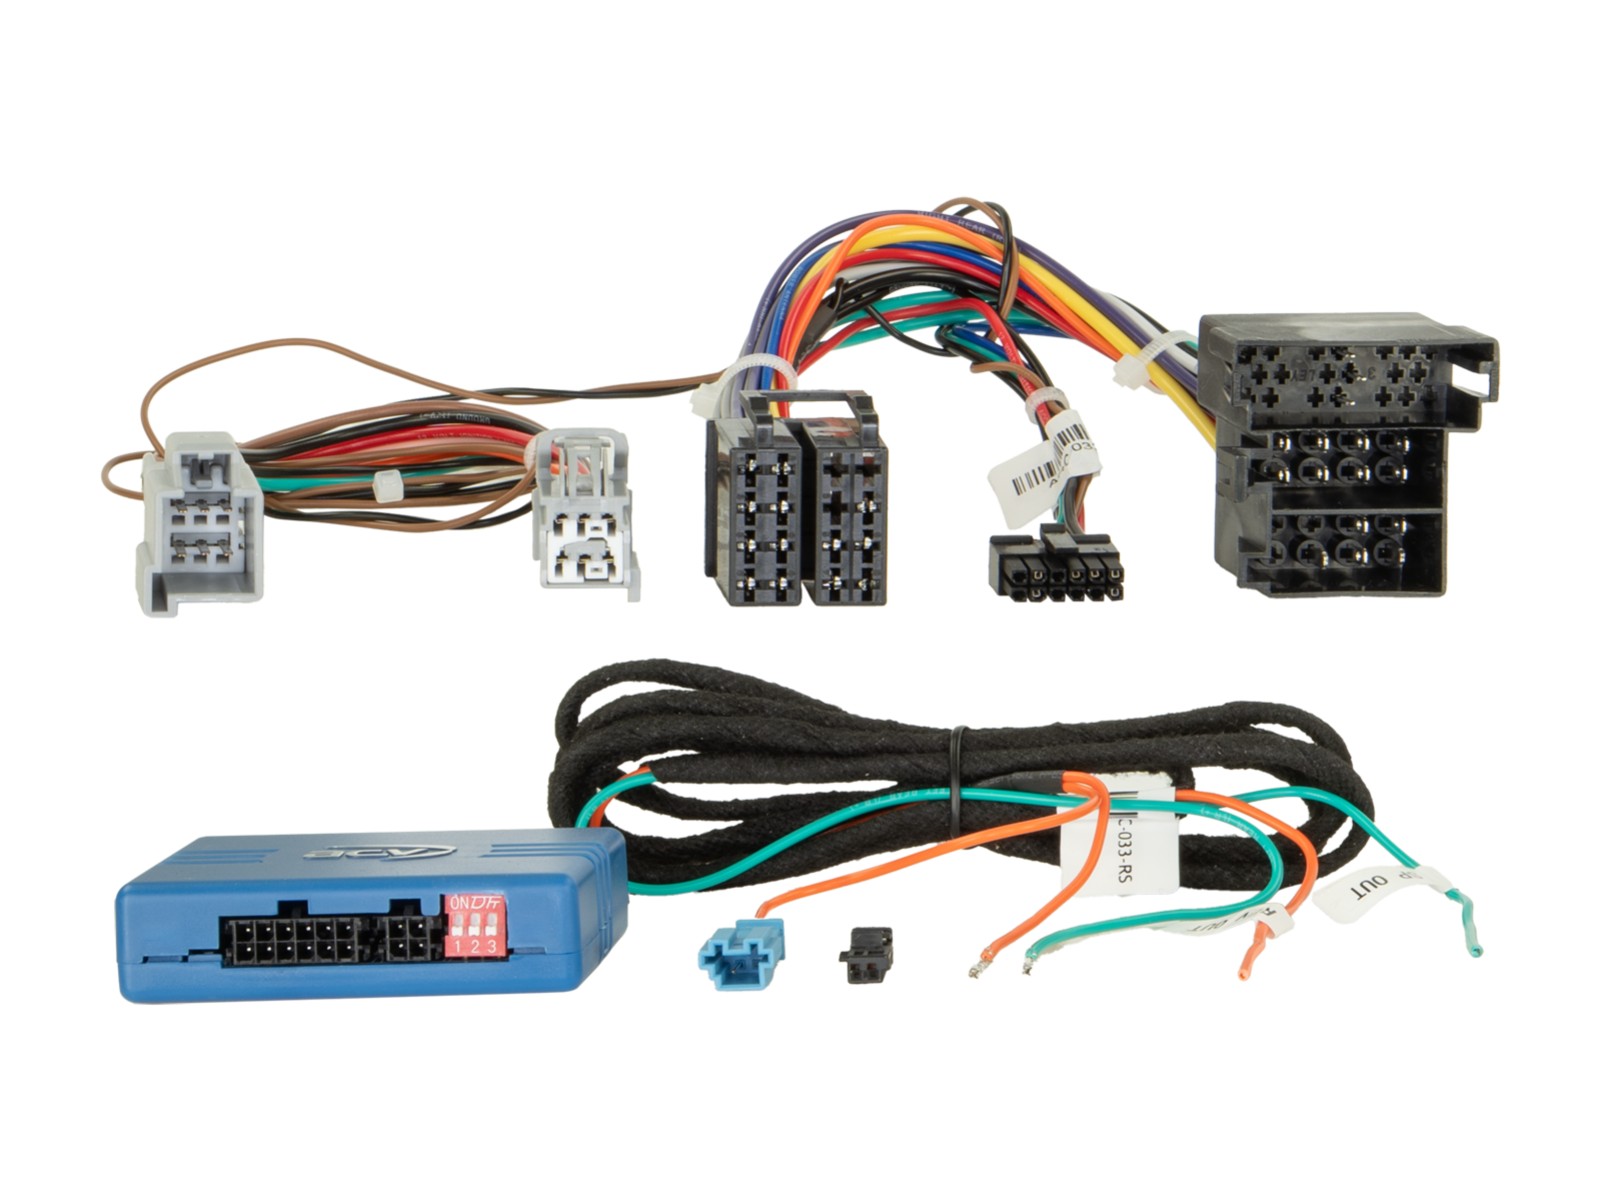
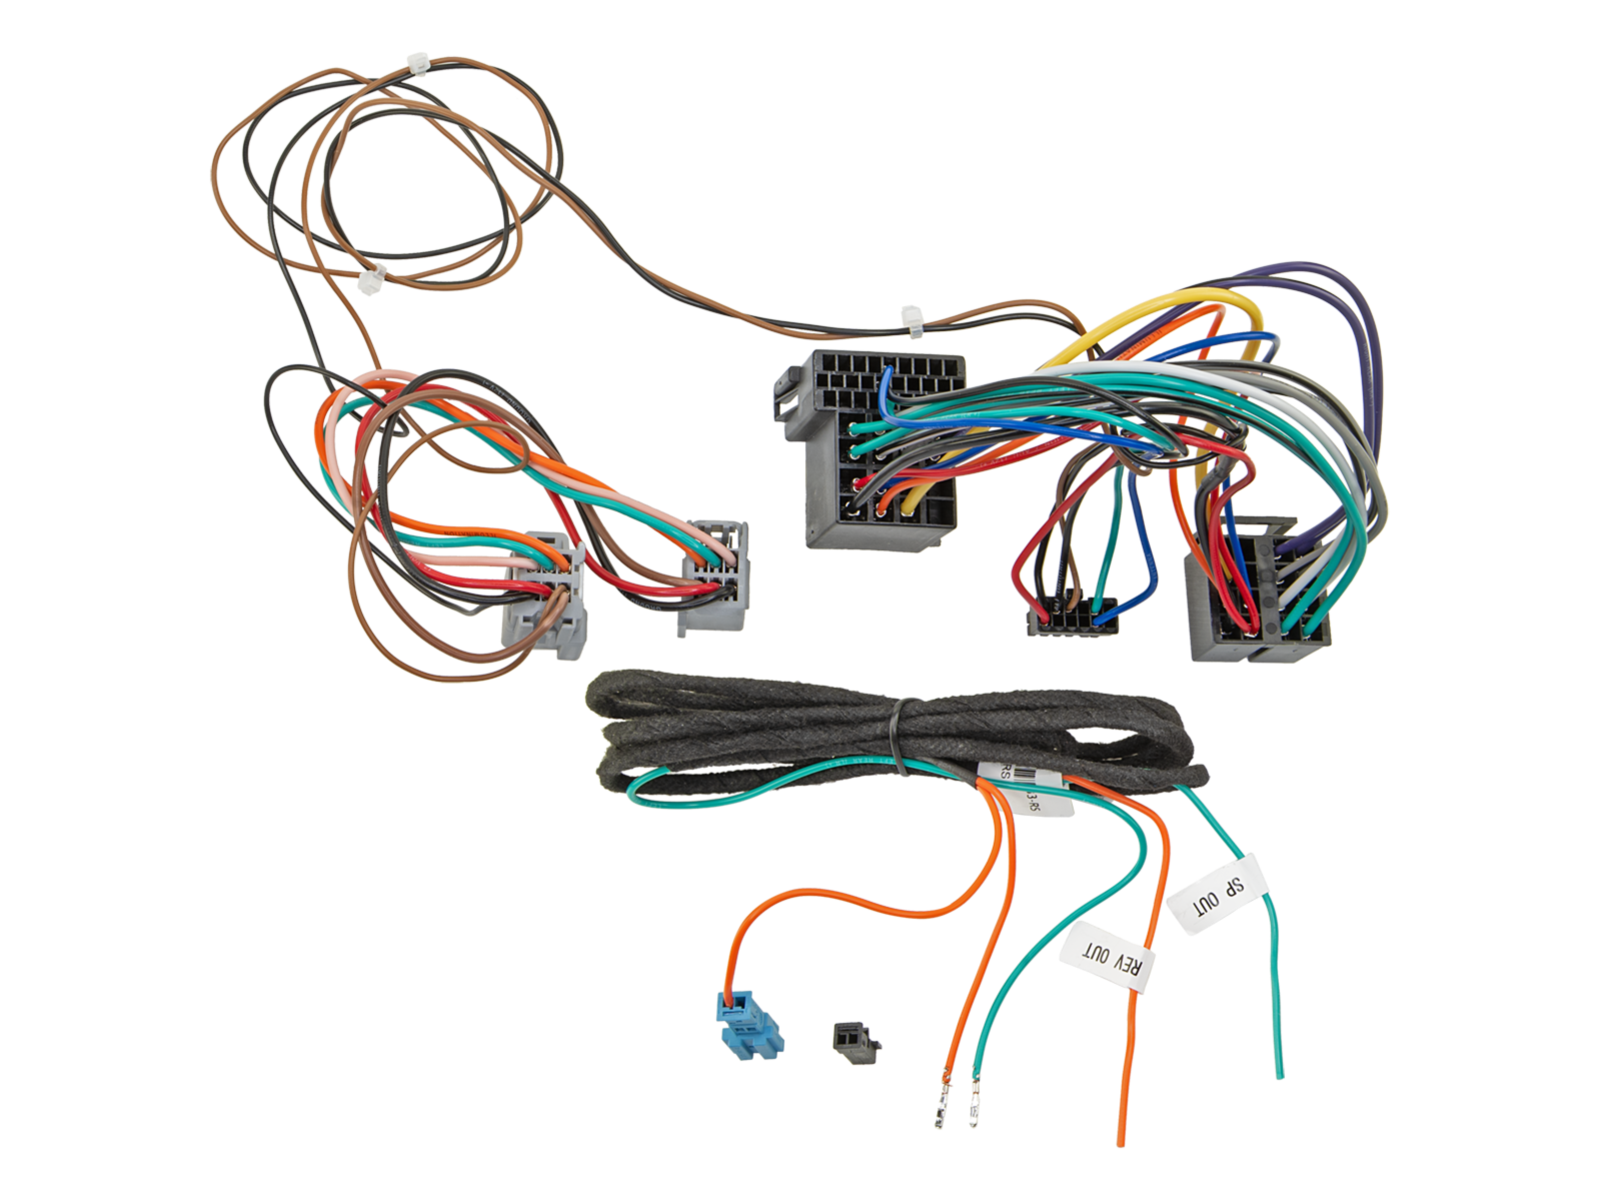
Steering wheel button control adapter for Citroen / Fiat / Opel ACV SWC 42A-1094-026-0
Retain the original steering wheel radio control functions when replacing the factory radio with an aftermarket unit. Depending on the vehicle's equipment, the range of functions and the software of the newly installed head unit, some functions may be limited or replaced by others. Compare the displayed wiring connectors with the connectors in your vehicle and make sure they match both technically and visually. Check whether one of the listed OEM head units was originally installed. Before final installation, verify the vehicle functionality, system settings and proper operation of the steering wheel control (SWC).
Intended for vehicles
- Citroen Jumper (250) (07/2024 -> 2025) - original OEM radio.
- Citroen e-Jumper (259) (07/2024 -> 2025) - original OEM radio.
- Citroen Relay (250) (2024 -> 2025) - original OEM radio.
- Fiat Ducato (ZAF 250) (11/2021 -> 11/2023) - original OEM radio.
- Fiat Ducato (ZAF 250) (11/2023 -> 2025) - original OEM radio.
- Fiat e-Ducato (ZAF 250) (04/2021 -> 03/2024) - original OEM radio.
- Fiat e-Ducato (ZAF 250) (03/2024 -> 2025) - original OEM radio.
- Opel Movano Cargo C (Y) (01/2024 -> 2025) - original OEM radio.
- Opel Movano Electric Cargo C (Y) (01/2024 -> 2025) - original OEM radio.
Technical Information
- Analog version.
- Connector: ISO / Mini ISO.
- Connector: 6 pin Fiat T-Harness > phone.
- Connector: connection to fuse box > speed signal / reverse signal (according to the manual).
- Support for vehicles with open dashboard.
- Support for vehicles with inductive charging > phone function supported.
Steering Wheel Control (SWC)
- 6 SWC control functions on the rear side of the steering wheel.
- Connection to fuse box:
- Green wire: speed signal (black 60-pin connector, Pin 22).
- Orange wire: reverse signal +12V (green 60-pin connector, Pin 17).
Diagnostic LED indication:
- Blue solid: interface active, +12 V ignition present.
- Red solid: steering wheel button function detected.
Important Additional Information
- Suitable for Sony, Kenwood, Panasonic, JVC, Pioneer, Blaupunkt, Clarion, Alpine, LG, Zenec, Becker aftermarket radios.
- To fully activate the adapter, it is necessary to order the connection cable for the specific head unit brand.
General Installation Instructions
Verification Before Installation:
- Check all control functions and vehicle settings using the original OEM HU.
- Disconnect the original radio (OEM HU) in a voltage-free condition.
- Check all interface connections – without power.
Connection and Installation Sequence:
- Set and check the HW configuration of the interface – without power.
- Check the configuration of the HU connection cable – without power.
- Connect the cable to the HU according to the aftermarket device manual.
- Connect the remaining wires according to the device manual.
- Connect the complete installation to the vehicle – connect the main power supply last.
- Perform the software configuration of the interface according to the product description or manual.
- Configure the aftermarket HU (steering wheel control, camera, handsfree, antenna power etc.).
- Perform a functional test of steering wheel control and vehicle communication.
Configuration Changes:
- All changes must be carried out without power.
- After changes repeat steps 5 to 8 above.
In Case of Failure:
- Reinstall the original OEM HU.
- Start the original unit.
- Initiate CAN Bus shutdown.
- Check the HW configuration of the interface.
- After CAN Bus shutdown repeat steps 5 and 6.
When Modifying Wiring:
- Installation and modifications may only be carried out by professionally trained personnel.
- All changes must be verified before connection regarding manufacturer approval or impact on vehicle warranty.
- All modifications must be verified by measurement and comparison with the vehicle wiring diagram.
- Modifications are carried out at your own responsibility without guarantee of functionality.
- Modifications are performed at your own risk without guarantee against damage to the vehicle, device or interface.
- Modifications of pre-installed wiring may result in loss of product warranty.
| Catalog number | 42A-1094-026-0 |
| Brand | ACV |
| Links | Official web presentation |
Evaluation
- Car radios and accessories Steering wheel button control adapters Citroen steering wheel adapters
- Car radios and accessories Steering wheel button control adapters Citroen steering wheel adapters Citroën Jumpy steering wheel adapters
- Car radios and accessories Steering wheel button control adapters Citroen steering wheel adapters Citroën Relay steering wheel adapters
- Car radios and accessories Steering wheel button control adapters Fiat steering wheel adapters
- Car radios and accessories Steering wheel button control adapters Fiat steering wheel adapters Fiat Ducato steering wheel adapters
- Car radios and accessories Steering wheel button control adapters Opel steering wheel adapters
- Car radios and accessories Steering wheel button control adapters Opel steering wheel adapters Opel Movano steering wheel adapters
- ACV
You might also be interested
Connection cable 42ARC000 Quick previewconnection cable for steering wheel control adapters Blaupunkt, China HU, ESX, Kenwood, Snooper 5,16 EUR1 to 4 weeksConnection cable 42ARC100
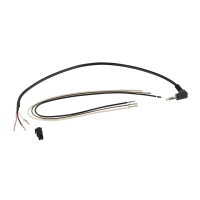 Quick previewconnection cable for steering wheel control adapters Alpine, Blaupunkt, China HU, Clarion, Digital Dynamics, ESX, JVC, Kenwood, Pioneer, Snooper, Sony, XZent and Zenec 5,16 EUR1 to 4 weeksConnection cable 42ARC101
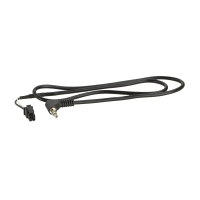 Quick previewconnection cable for steering wheel control adapters Alpine5,16 EUR1 to 4 weeksConnection cable 42ARC103
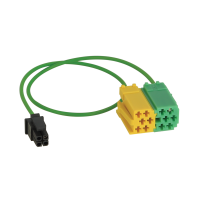 Quick previewconnection cable for steering wheel control adapters Bosch-Blaupunkt > 20105,16 EUR1 to 4 weeksConnection cable 42ARC104
 Quick previewconnection cable for steering wheel control adapters Clarion and JVC 5,16 EUR1 to 4 weeksConnection cable 42ARC105
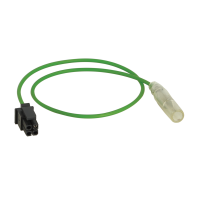 Quick previewconnection cable for steering wheel control adapters JVC and Kenwood 5,16 EUR1 to 4 weeksConnection cable 42ARC107
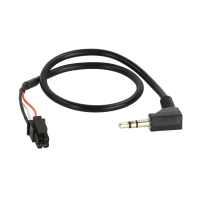 Quick previewconnection cable for steering wheel control adapters Blaupunkt 2010 ->, Kenwood 2017 ->, Pioneer and Sony 5,16 EURIn stockConnection cable 42ARC1072
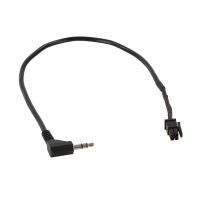 Quick previewconnection cable for steering wheel control adapters Pioneer AVH / DMH / SPH 2021 ->5,96 EUR1 to 4 weeksConnection cable 42ARC108
 Quick previewconnection cable for steering wheel control adapters Digital Dynamics, XZent and Zenec 5,16 EUR1 to 4 weeksConnection cable 42C-3414101
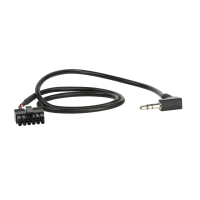 Quick previewconnection cable for steering wheel control adapters Pioneer, Blaupunkt 2010 ->, Kenwood 2017 -> car radios11,16 EUR1 to 4 weeksConnection cable 42C-3414104
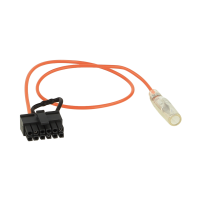 Quick previewconnection cable for steering wheel control adapters Kenwood 11,16 EUR1 to 4 weeksConnection cable 42C-3414105
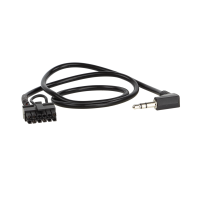 Quick previewconnection cable for steering wheel control adapters Alpine 11,16 EUR1 to 4 weeksConnection cable 42C-3414107
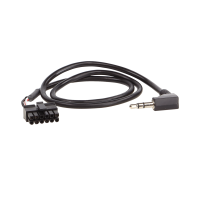 Quick previewconnection cable for steering wheel control adapters Sony, Phonocar 11,16 EUR1 to 4 weeksConnection cable 42C-3414124
 Quick previewconnection cable for steering wheel control adapters Blaupunkt 2010 ->, China HU, ESX, Kenwood 2020 ->, Snooper, XZent28,76 EUR1 to 4 weeksConnection cable 42C-3414128
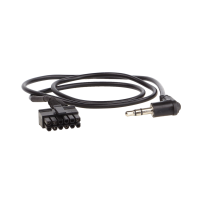 Quick previewconnection cable for steering wheel control adapters for JVC 11,16 EUR1 to 4 weeksConnection cable 42C-3414140
 Quick previewconnection cable for steering wheel control adapters for JVC 11,16 EUR1 to 4 weeksConnection cable 42CTALPINELEAD-0
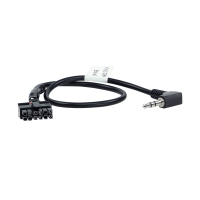 Quick previewconnection cable for steering wheel control adapters for Alpine 2,36 EUR1 to 4 weeksConnection cable 42CTBLAUPUNKTLEAD
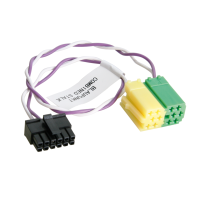 Quick previewconnection cable for steering wheel control adapters for Bosch-Blaupunkt car radios 2010 ->7,16 EURIn stockConnection cable 42CTCHINAHULEAD-0
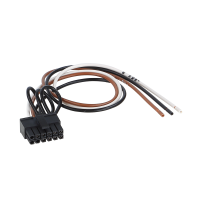 Quick previewconnection cable for steering wheel control adapters for Blaupunkt, China HU, ESX, Kenwood 2020 ->, Snooper, XZent5,96 EURIn stockConnection cable 42CTCLARIONLEAD-0
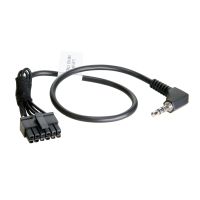 Quick previewconnection cable for steering wheel control adapters for Clarion 2,36 EUR1 to 4 weeksConnection cable 42CTJVCLEAD-0
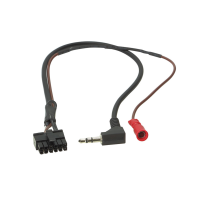 Quick previewconnection cable for steering wheel control adapters for JVC 2,36 EUR1 to 4 weeksConnection cable 42CTKENWOODLEAD-0
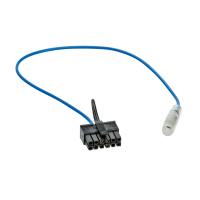 Quick previewconnection cable for steering wheel control adapters for Kenwood 5,96 EUR1 to 4 weeksConnection cable 42CTMULTILEAD-0
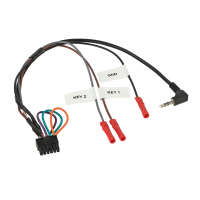 Quick previewconnection cable for steering wheel control adapters for Alpine, Blaupunkt 2010 ->, China HU, Clarion, ESX, JVC, Kenwood, Panasonic, Philips, Pioneer, Snooper, Sony, XZent, Zenec car radios2,36 EUR1 to 4 weeksConnection cable 42CTMULTILEAD3-0
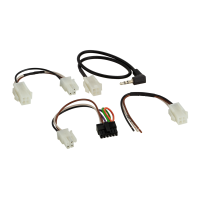 Quick previewconnection cable for steering wheel control adapters for Alpine, Beat, Blaupunkt 2010 ->, China HU, Clarion, ESX, JVC, Kenwood, Kenwood 2020 ->, Nakamichi, Panasonic, Philips, Pioneer, Snooper, Sony, XZent, Zenec8,76 EUR1 to 4 weeksConnection cable 42CTMULTILEAD5
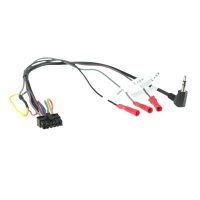 Quick previewconnection cable for steering wheel control adapters for Alpine, Beat, Blaupunkt 2010 ->, China HU, Clarion, ESX, JVC, Kenwood, Nakamichi, Panasonic, Philips, Pioneer, Snooper, Sony, XZent, Zenec car radios.2,76 EUR1 to 4 weeksConnection cable 42CTPANASONICLEAD-0
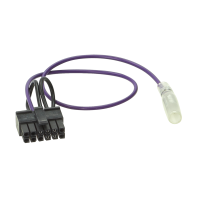 Quick previewconnection cable for steering wheel control adapters for Panasonic 1,56 EUR1 to 4 weeksConnection cable 42CTPIONEERLEAD-0
 Quick previewconnection cable for steering wheel control adapters for Pioneer, Blaupunkt 2010 ->, Kenwood 2017 ->1,96 EUR1 to 4 weeksConnection cable 42CTPIONEERLEAD2
 Quick previewconnection cable for steering wheel control adapters for Pioneer1,96 EUR1 to 4 weeksConnection cable 42CTSONYLEAD-0
 Quick previewconnection cable for steering wheel control adapters for Sony, Blaupunkt 2010 ->, Kenwood 2017 ->1,96 EUR1 to 4 weeksInterconnect cable 42XMULTILEAD1-0
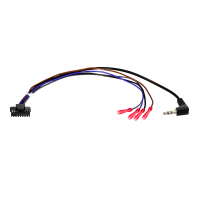 Quick previewconnection cable for steering wheel control adapters for Alpine, Blaupunkt 2010 ->, China HU, Clarion, ESX, Grundig, JVC, Kenwood, Philips, Pioneer, Snooper, Sony, XZent, Zenec car radios5,16 EUR1 to 4 weeks
Quick previewconnection cable for steering wheel control adapters Blaupunkt, China HU, ESX, Kenwood, Snooper 5,16 EUR1 to 4 weeksConnection cable 42ARC100Quick previewconnection cable for steering wheel control adapters Alpine, Blaupunkt, China HU, Clarion, Digital Dynamics, ESX, JVC, Kenwood, Pioneer, Snooper, Sony, XZent and Zenec 5,16 EUR1 to 4 weeksConnection cable 42ARC101Quick previewconnection cable for steering wheel control adapters Alpine5,16 EUR1 to 4 weeksConnection cable 42ARC103Quick previewconnection cable for steering wheel control adapters Bosch-Blaupunkt > 20105,16 EUR1 to 4 weeksConnection cable 42ARC104Quick previewconnection cable for steering wheel control adapters Clarion and JVC 5,16 EUR1 to 4 weeksConnection cable 42ARC105Quick previewconnection cable for steering wheel control adapters JVC and Kenwood 5,16 EUR1 to 4 weeksConnection cable 42ARC107Quick previewconnection cable for steering wheel control adapters Blaupunkt 2010 ->, Kenwood 2017 ->, Pioneer and Sony 5,16 EURIn stockConnection cable 42ARC1072Quick previewconnection cable for steering wheel control adapters Pioneer AVH / DMH / SPH 2021 ->5,96 EUR1 to 4 weeksConnection cable 42ARC108Quick previewconnection cable for steering wheel control adapters Digital Dynamics, XZent and Zenec 5,16 EUR1 to 4 weeksConnection cable 42C-3414101Quick previewconnection cable for steering wheel control adapters Pioneer, Blaupunkt 2010 ->, Kenwood 2017 -> car radios11,16 EUR1 to 4 weeksConnection cable 42C-3414104Quick previewconnection cable for steering wheel control adapters Kenwood 11,16 EUR1 to 4 weeksConnection cable 42C-3414105Quick previewconnection cable for steering wheel control adapters Alpine 11,16 EUR1 to 4 weeksConnection cable 42C-3414107Quick previewconnection cable for steering wheel control adapters Sony, Phonocar 11,16 EUR1 to 4 weeksConnection cable 42C-3414124Quick previewconnection cable for steering wheel control adapters Blaupunkt 2010 ->, China HU, ESX, Kenwood 2020 ->, Snooper, XZent28,76 EUR1 to 4 weeksConnection cable 42C-3414128Quick previewconnection cable for steering wheel control adapters for JVC 11,16 EUR1 to 4 weeksConnection cable 42C-3414140Quick previewconnection cable for steering wheel control adapters for JVC 11,16 EUR1 to 4 weeksConnection cable 42CTALPINELEAD-0Quick previewconnection cable for steering wheel control adapters for Alpine 2,36 EUR1 to 4 weeksConnection cable 42CTBLAUPUNKTLEADQuick previewconnection cable for steering wheel control adapters for Bosch-Blaupunkt car radios 2010 ->7,16 EURIn stockConnection cable 42CTCHINAHULEAD-0Quick previewconnection cable for steering wheel control adapters for Blaupunkt, China HU, ESX, Kenwood 2020 ->, Snooper, XZent5,96 EURIn stockConnection cable 42CTCLARIONLEAD-0Quick previewconnection cable for steering wheel control adapters for Clarion 2,36 EUR1 to 4 weeksConnection cable 42CTJVCLEAD-0Quick previewconnection cable for steering wheel control adapters for JVC 2,36 EUR1 to 4 weeksConnection cable 42CTKENWOODLEAD-0Quick previewconnection cable for steering wheel control adapters for Kenwood 5,96 EUR1 to 4 weeksConnection cable 42CTMULTILEAD-0Quick previewconnection cable for steering wheel control adapters for Alpine, Blaupunkt 2010 ->, China HU, Clarion, ESX, JVC, Kenwood, Panasonic, Philips, Pioneer, Snooper, Sony, XZent, Zenec car radios2,36 EUR1 to 4 weeksConnection cable 42CTMULTILEAD3-0Quick previewconnection cable for steering wheel control adapters for Alpine, Beat, Blaupunkt 2010 ->, China HU, Clarion, ESX, JVC, Kenwood, Kenwood 2020 ->, Nakamichi, Panasonic, Philips, Pioneer, Snooper, Sony, XZent, Zenec8,76 EUR1 to 4 weeksConnection cable 42CTMULTILEAD5Quick previewconnection cable for steering wheel control adapters for Alpine, Beat, Blaupunkt 2010 ->, China HU, Clarion, ESX, JVC, Kenwood, Nakamichi, Panasonic, Philips, Pioneer, Snooper, Sony, XZent, Zenec car radios.2,76 EUR1 to 4 weeksConnection cable 42CTPANASONICLEAD-0Quick previewconnection cable for steering wheel control adapters for Panasonic 1,56 EUR1 to 4 weeksConnection cable 42CTPIONEERLEAD-0Quick previewconnection cable for steering wheel control adapters for Pioneer, Blaupunkt 2010 ->, Kenwood 2017 ->1,96 EUR1 to 4 weeksConnection cable 42CTPIONEERLEAD2Quick previewconnection cable for steering wheel control adapters for Pioneer1,96 EUR1 to 4 weeksConnection cable 42CTSONYLEAD-0Quick previewconnection cable for steering wheel control adapters for Sony, Blaupunkt 2010 ->, Kenwood 2017 ->1,96 EUR1 to 4 weeksInterconnect cable 42XMULTILEAD1-0Quick previewconnection cable for steering wheel control adapters for Alpine, Blaupunkt 2010 ->, China HU, Clarion, ESX, Grundig, JVC, Kenwood, Philips, Pioneer, Snooper, Sony, XZent, Zenec car radios5,16 EUR1 to 4 weeksask us
Recently viewed products
Audible Physics Monitor One (Abbey Road Edition) Free transport TipQuick previewcomponent speakers, Ø 165 mm, 120 W RMS, 4 Ω, 90.5 dB (2.83V/1m), mounting depth 70.5 mm749,00 EURIn stockACV SWC Citroen / Fiat / Opel / Peugeot 42SFA019-0
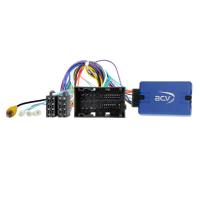 Quick previewsteering wheel adapter for Citroën Jumper (250) (05/14->10/22, 10/22->24), e-Jumper (259) (10/21->24), Citroën Relay (250) (06->24), Fiat 500 (ZAF 312) (07/16->23), 500L (ZAF 199) (10/12->07/17, 07/17->03/22), Doblo (ZAF 263) (01/15->06/22), Ducato (ZFA 250) (05/14->11/21), Opel Movano Cargo C (Y) (10/21->01/24, 01/24->24), Movano Electrik Cargo C (Y) (10/21->01/24, 01/24->24), Peugeot Boxer (Y) (09/14->12/19, 08/18->24) a e-Boxer (Y) (10/21->24)67,60 EUR1 to 4 weeks
TipQuick previewcomponent speakers, Ø 165 mm, 120 W RMS, 4 Ω, 90.5 dB (2.83V/1m), mounting depth 70.5 mm749,00 EURIn stockACV SWC Citroen / Fiat / Opel / Peugeot 42SFA019-0Quick previewsteering wheel adapter for Citroën Jumper (250) (05/14->10/22, 10/22->24), e-Jumper (259) (10/21->24), Citroën Relay (250) (06->24), Fiat 500 (ZAF 312) (07/16->23), 500L (ZAF 199) (10/12->07/17, 07/17->03/22), Doblo (ZAF 263) (01/15->06/22), Ducato (ZFA 250) (05/14->11/21), Opel Movano Cargo C (Y) (10/21->01/24, 01/24->24), Movano Electrik Cargo C (Y) (10/21->01/24, 01/24->24), Peugeot Boxer (Y) (09/14->12/19, 08/18->24) a e-Boxer (Y) (10/21->24)67,60 EUR1 to 4 weeks